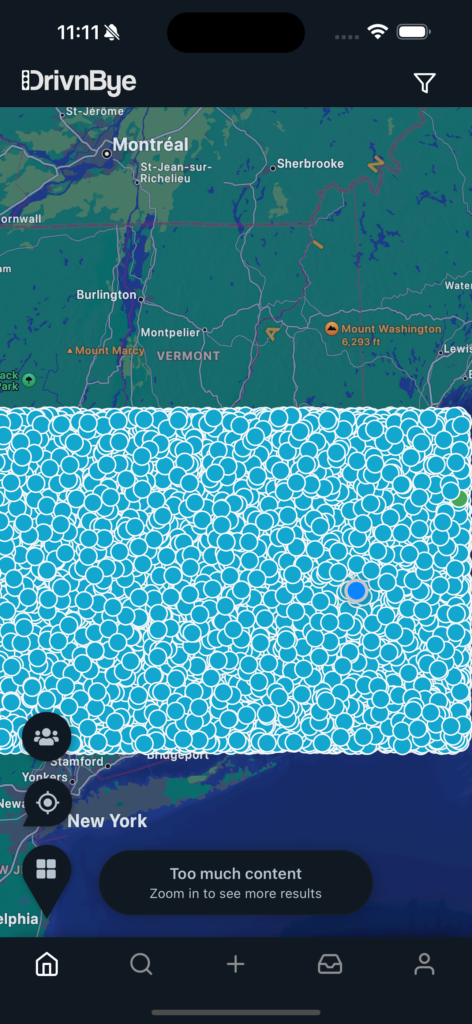
While building our application we chose an area around Boston, MA to generate some fake data. This fake data was only about 200 posts, 10 events and 10 businesses. Not that much data to parse in the database. While refactoring our unit tests and fake data scripts we realized something; we’re not generating enough fake data to test how our SQL queries perform on a database with millions of rows.
We refactored our test scripts and generated over 2,000,000 posts, 100,000 events, and 5,000 businesses. When the app loaded up we were observing it took quite a while for just 100 markers to load on our map. So, what gives?
Our original query (below, just cut down to the related subject matter) was simple, elegant, and easy to understand but it’s also inefficient and slow. You see, what happens is every time we run this query it scans the entire database looking at the latitude and longitude values of every row making 4 inequality comparisons for every row. Ignoring any kind of caching mechanism inequality comparisons are generally very expensive in SQL.
SELECT
  id
FROM
  "Post" AS p
WHERE
  p.latitude BETWEEN 42.032592 AND 42.67398
AND
  p.longitude BETWEEN -71.728091 AND -70.771656;
LIMIT 100
Introducing geohashing
Before we can jump into the next query let’s have a crash course on what geohashing is and how it made out queries incredibly faster.
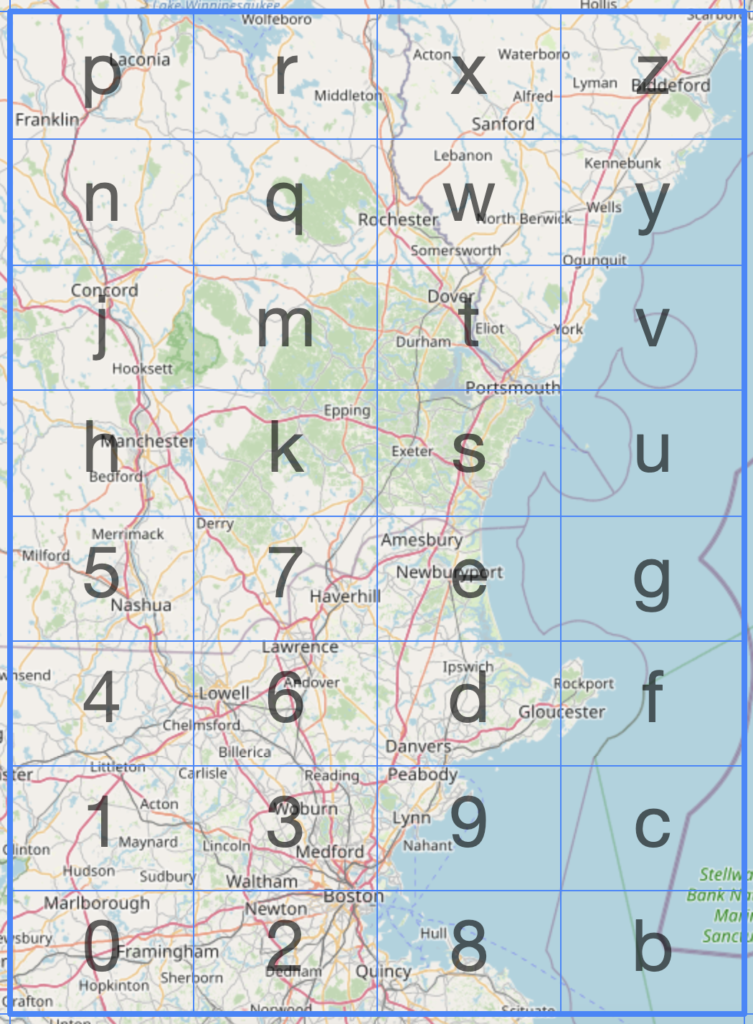
How can we take a latitude and longitude value and narrow it down to a single string that represents your exact location? That is the problem geohashing solves. By taking the world, splitting it up into squares, then subdivide each square recursively assigning an identifier to each section. An awesome tool is the geohashing map to visualize how a string is able to determine your location.


This can also work in reverse, if we’re viewing an area on the map we can calculate the hashes currently being viewed on the map. If I want to look at all of Boston, MA The geohash3 value would be DRT.
Each time a letter is added to the geohash the precision increases. For our case we took a hybrid approach, when the user zooms out we convert over to a geohash3 precision, and when they zoom in we use a geohash4 value. This allows the user to zoom out to see the whole state of Texas with the same performance as zooming into a singular city.
If you’re looking for more information on geohashes I reccomend reading these resources:

The Query
Now that we have a brief explanation of what geohashing is we can see how it’ll be beneficial to switch over from our original query to geohashing with varying precision.
Viewing the same area in the original query we’re looking for 4 geohashes. This query also scans the database for 4 hashes. The difference is we are making a equality comparison (equal) to a singular index on the “Post” table.
SELECT
  id
FROM
  "Post" AS p
WHERE
  p.geohash3 IN ( 'drk', 'drm', 'drs', 'drt' );
LIMIT 100
So, we’re making 4 comparisons again whats the huge difference? A couple things, we’re only looking at a single index on the “Post” table, and we’re also making a equality comparison instead of an inequality comparison. In SQL, equality comparisons are dramatically more efficient than inequalities. These two key differences lead to an improvement in performance that is very noticeable by a human, as you see below.
The Performance Benchmarking
First we have to fill the database with a ton of data. For these bench marks we created a “Post” table with over 2,000,000 rows. These benchmark times may seem like we’re making a big deal out of a couple milliseconds, but when you have hundreds or thousands of users all querying the database those milliseconds add up very quick.
Quick disclaimer: I am not an SQL wizard and I am sure there are technical details missed but within the DrivnBye team we were able to see an incredible decrease in latency and hardware utilized while multiple users abuse the backend making many back-to-back API requests all across the country.
Original BETWEEN Query
SELECT
  id
FROM
  "Post" AS p
WHERE
  p.latitude BETWEEN 42.032592 AND 42.67398
AND
  p.longitude BETWEEN -71.728091 AND -70.771656;
LIMIT 100
To run this query took 34ms, pretty quick! but what happens if we increase the limit to maybe 1,000 rows? That is when we see an increase in execution time to 452ms. Thats a pretty noticeable time to a human, especially when they’re panning around on the map view.
Geohash Query
SELECT
  id
FROM
  "Post"
WHERE
  "geohash3" IN ( 'drk', 'drm', 'drs', 'drt' )
LIMIT 100;
To run this query took only 3.8ms, even quicker than the original query! How about 1,000 rows? An increase to 12.45ms but not noticeable by a human.
Conclusion
The original BETWEEN query, while initially swift with a limit of 100 rows at 34ms, revealed a noticeable slowdown when extended to 1,000 rows, clocking in at 452ms. This delay, perceptible to users interacting with map views, emphasized the need for optimization.
Enter the Geohash query. By utilizing the same spatial constraints but incorporating geohashing principles, we observed an astonishing improvement in execution time. The query, set to retrieve 100 rows, completed in a mere 3.8ms—outpacing the original query. Even with an increased limit to 1,000 rows, the Geohash query demonstrated remarkable resilience, registering only 12.45ms.
Performance Increase
For 100 Rows: Geohash Query is approximately 88.24% faster than the original BETWEEN query.
For 1,000 Rows: Geohash Query is approximately 97.24% faster than the original BETWEEN query.
An increase like this means we can allow more concurrent connections to our database without the requirement of scaling up increasing backend node or increasing hardware during peek hours.
Honorable Mention

Loading 22,500 markers within the DrivnBye app took 2.5 seconds to process the query and return the data to the client’s phone.
But it took close to 10 seconds for the app render all 22,500 markers on the map.
At this point, the backend was out performing the application which gives us great hope we’re going to efficiently support thousands of concurrent connections with minimal issues scaling.
